
How to Fix a Flat Bike Tire
Getting a flat tire is an inevitable part of cycling, no matter what type of riding you do. Fixing a flat bike tire is simple with basic tools, a little knowledge and plenty of practice. The more you do it, the more routine it will become. This article will walk you through the steps of how to fix a flat and change your bike tire, including details on changing both the front and rear tires.
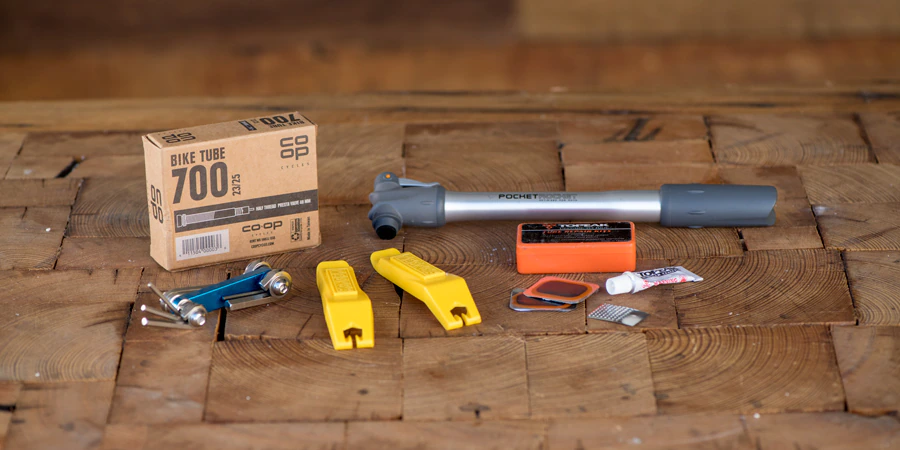
When riding your bike, always carry a spare tube, repair kit, tire levers, a bike pump or C02 inflator and a multi-tool and follow these simple directions to get back on the road quickly.
Here are five basic steps to fixing a flat bike tire:
- Remove the wheel: Release your brakes, then the wheel. (We’ll show you how to remove the front and rear wheels).
- Remove the tube: Deflate the tube completely and remove it by pressing on the bead (edge) of the tire or using a tire lever, so you can access the tube.
- Find the cause of the flat: Inspect the wheel, tire and tube for the location and causes of tears or punctures.
- Patch or replace the tube: When out riding, you may prefer to replace the tube with a new one and fix the damaged one later.
- Reinstall the wheel: We’ll walk you through the steps for the front and back wheel.
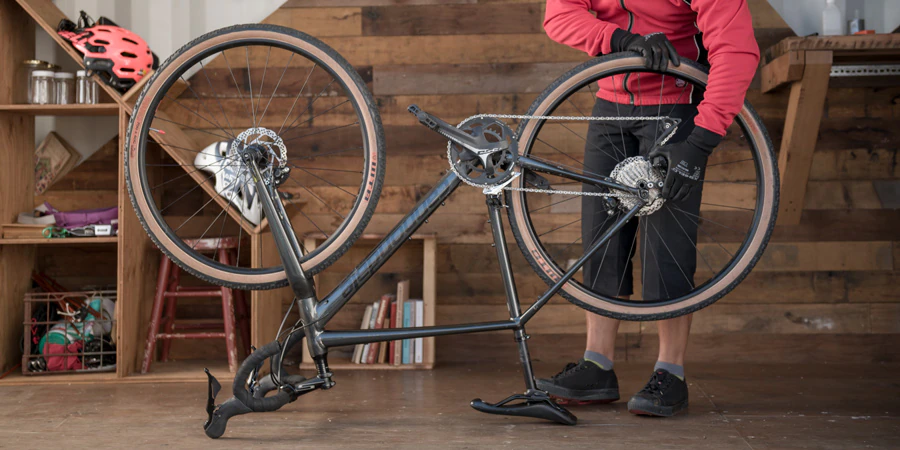
Remove the Wheel
First, if you have rim brakes, you’ll need to release your brakes.
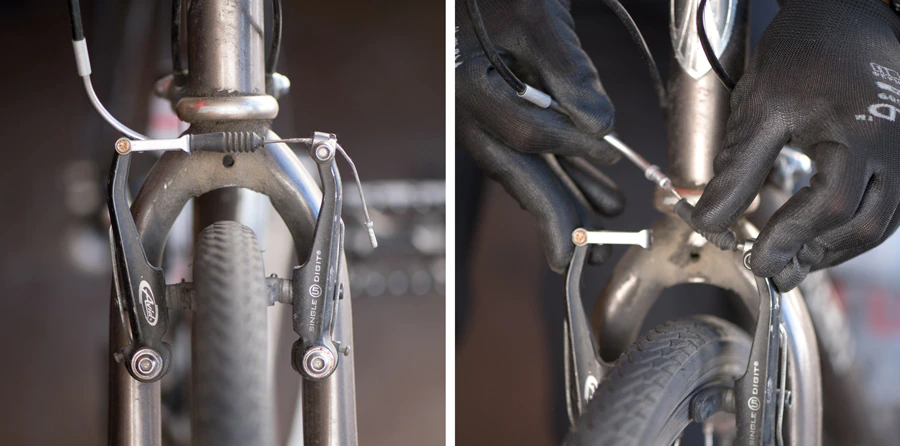
If you have a v-brake, squeeze the brake arms together to ease the tension so you can release the cable.
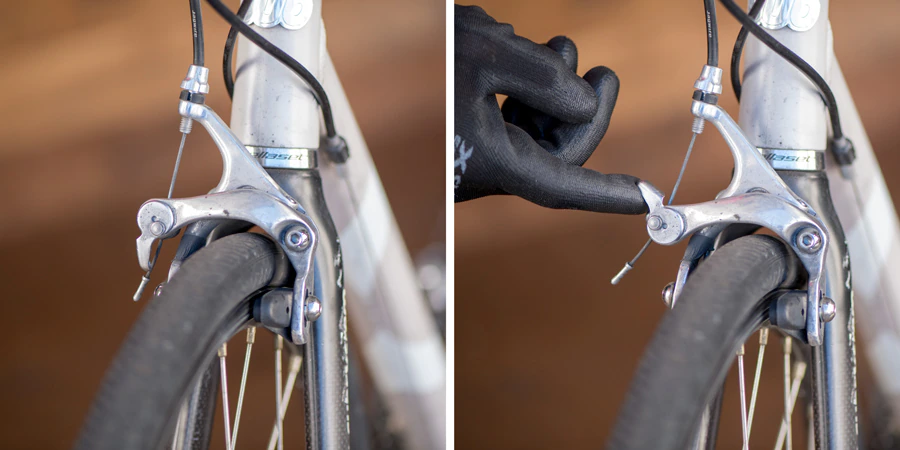
If you have a quick-release lever on the brake, open the lever.
Next, release the wheel from the frame.
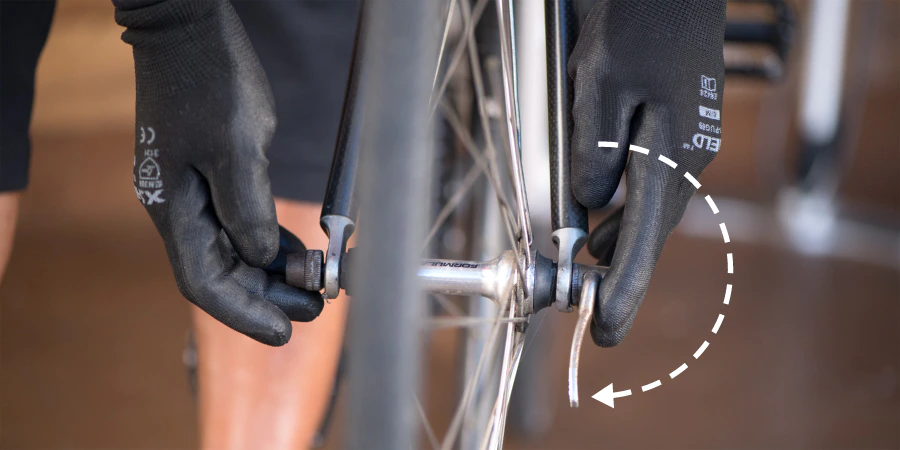
If you have a quick-release axle, open and hold the lever while you unscrew the nut on the opposite side.
To loosen a bolt-on axle, use a wrench to loosen the bolt.
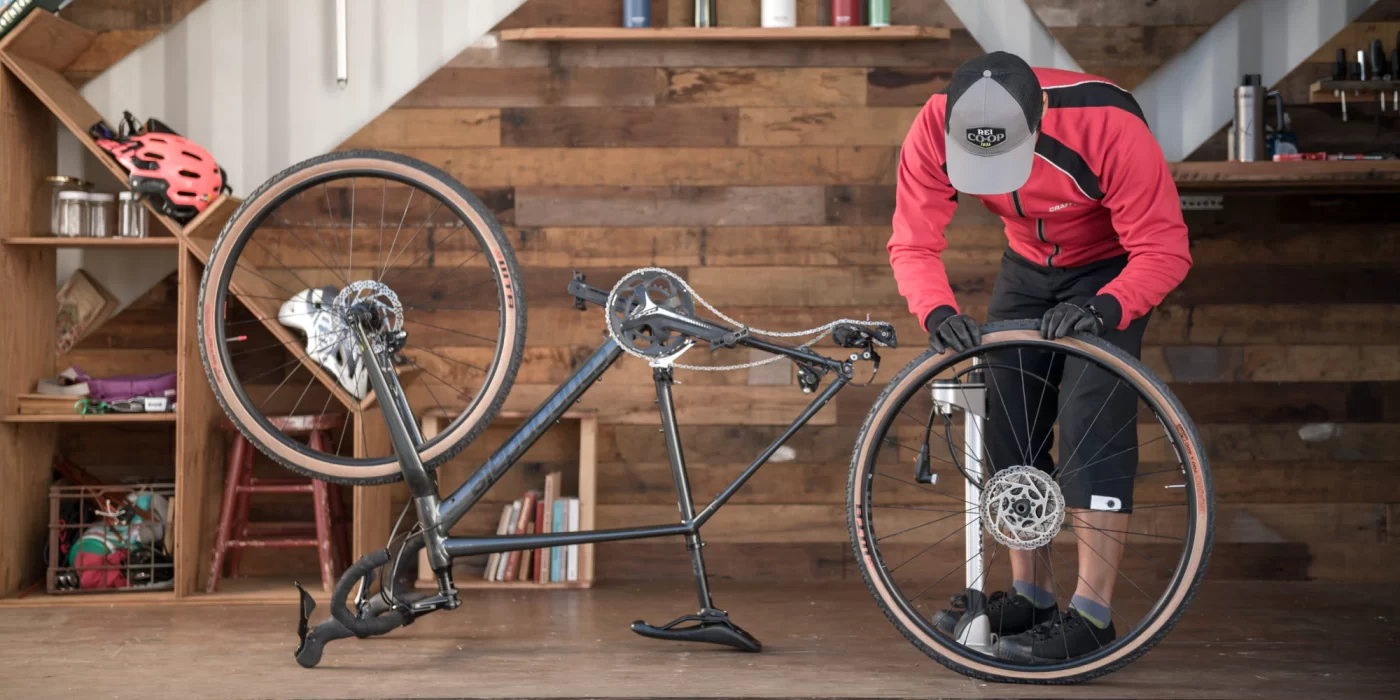
Tip: It helps to use a bike stand or to flip the bike upside down. Remember to remove your panniers and other bags beforehand.
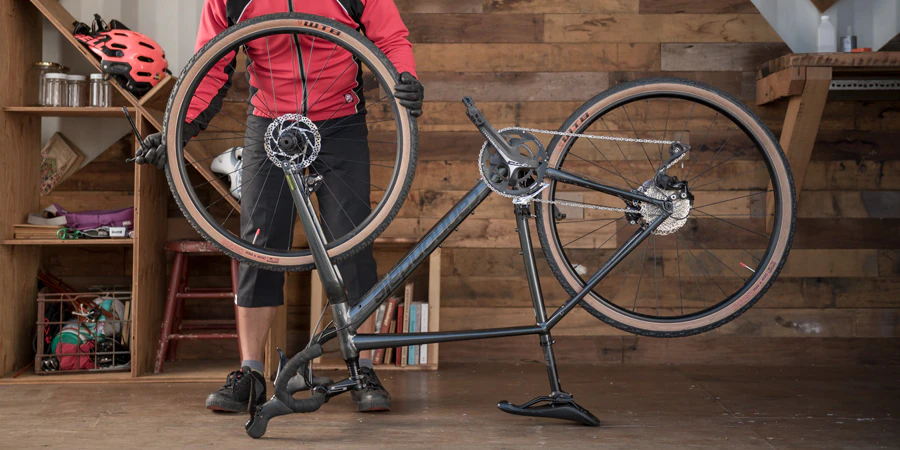
To remove the rear wheel, follow these steps:
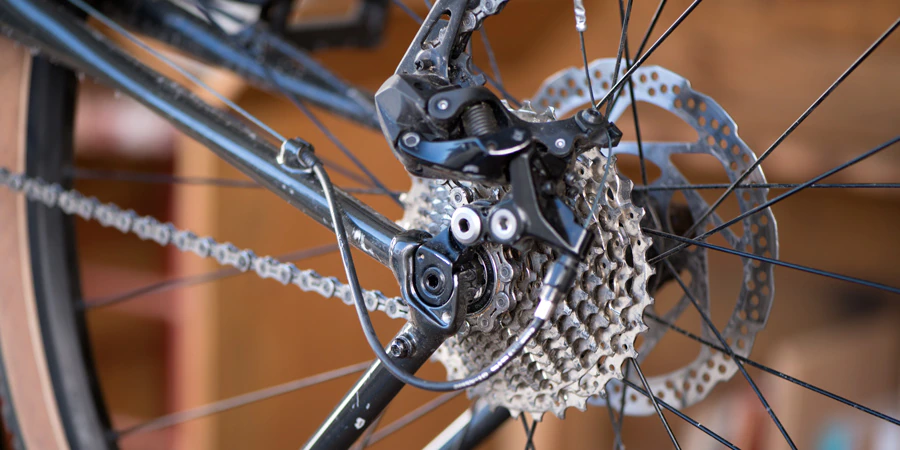
1. Shift your chain onto the smallest cog of the rear cassette.
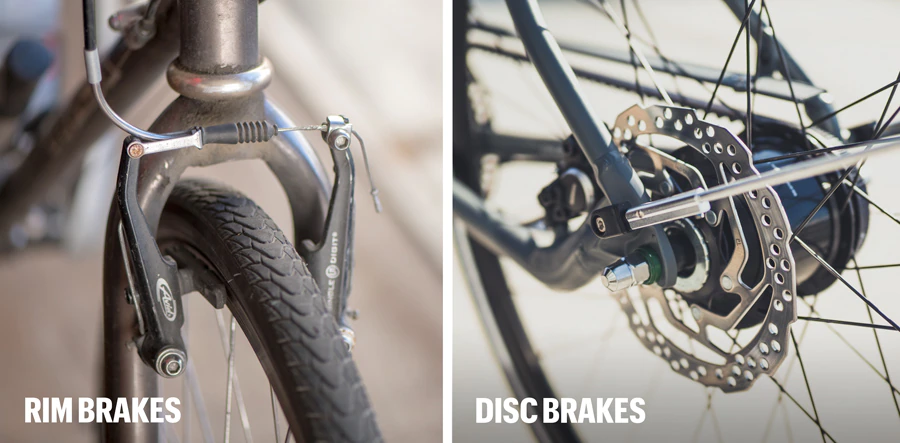
2. If you have rim brakes, open up the brakes so the tire doesn’t get stuck when you remove the wheel. (If you have disc brakes, you won’t need to release brakes.)
3. Many wheels have a quick-release axle system. Pull open the lever and spin to loosen; you may need to unscrew the nut on the opposite side.
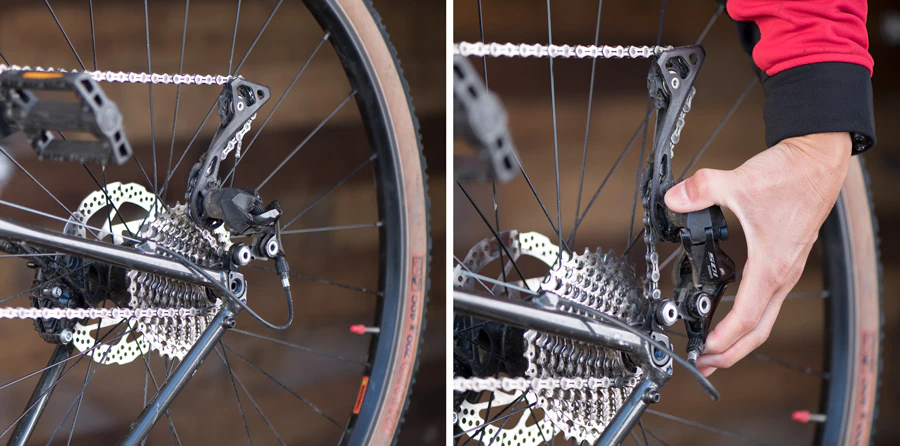
4. Push the rear derailleur back so that the chain lifts away from the cog.
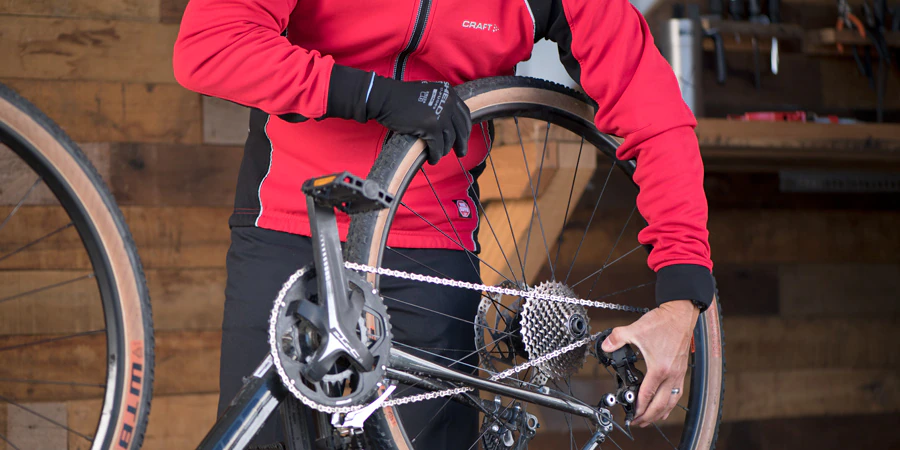
5. With your other hand, remove the wheel from the dropouts on the bike frame.
Tips:
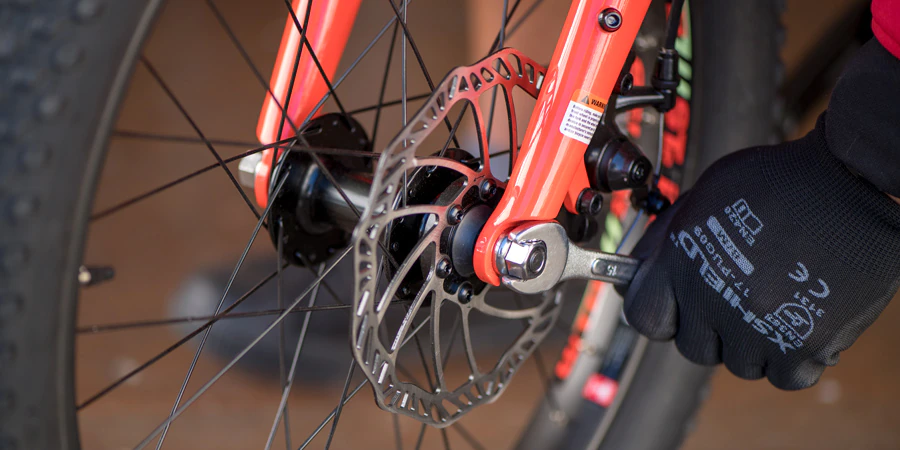
- If your bike has disc brakes, be careful not to touch the rotor when opening the quick-release mechanism because it can be hot enough to burn you. Also, avoid getting oil or other contaminants on your disc brakes.
- Practice taking the wheel on and off as often as possible. The more you do it, the easier it will be when you actually have to do it by the side of the road.
Remove the Tube
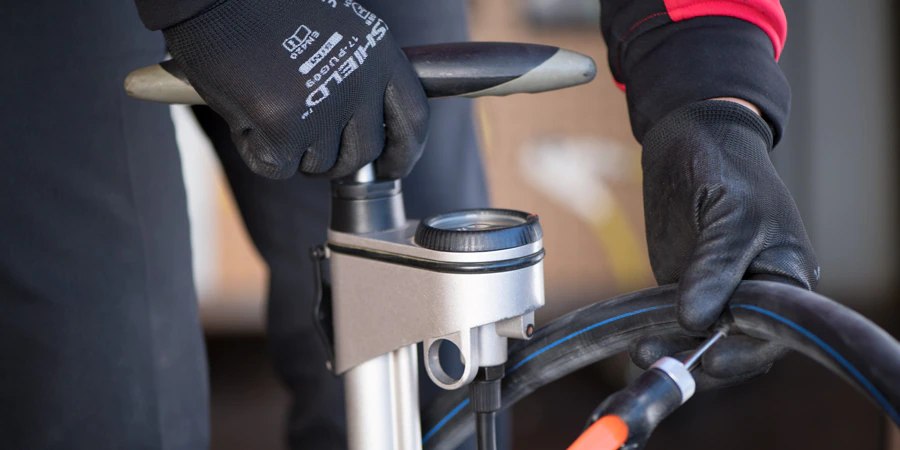
Deflate your bike tire completely. You’ll do it one of two ways, depending on the valve.
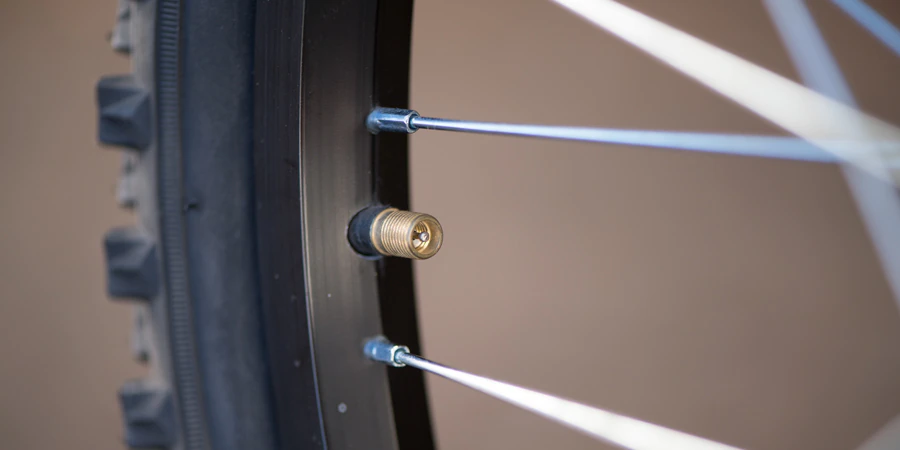
If you have the wider Schrader valve (the type you see on most car tires), press down on the small pin in the center of the tire valve.

If you have the thinner Presta valve, remove the plastic dust cap, turn the small valve at the top counterclockwise and press down to release air.
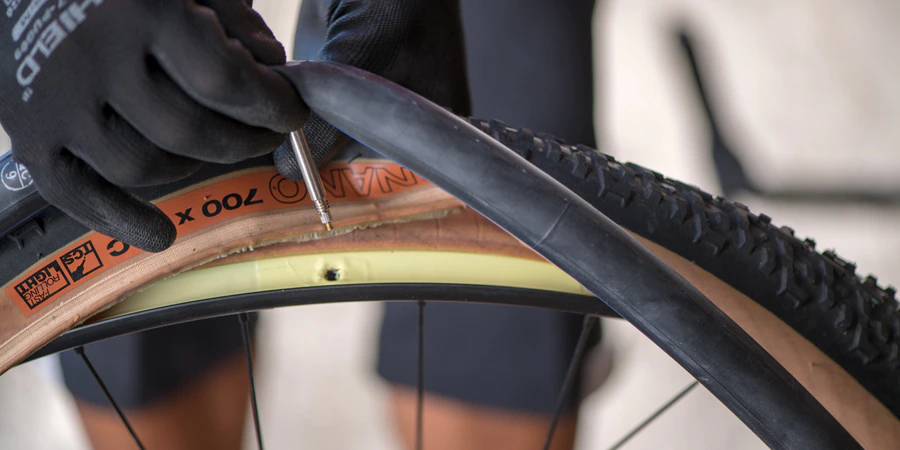
Next, unseat the tire bead (the edge of the tire that fits under the rim) using these steps:
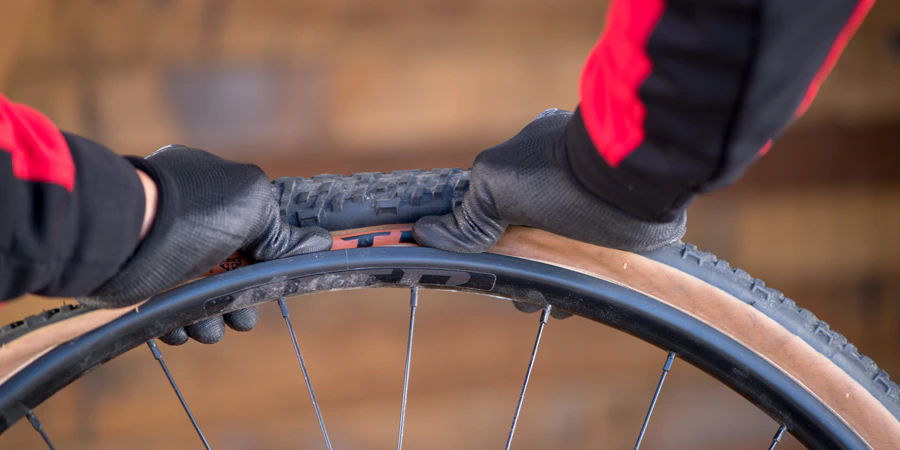
1. It’s more difficult to do without a tire lever, but you can unseat the tire bead by pushing the bead edge in toward the center of the rim and working your way around the rim. Then move the bead of the tire up and over the outside edge of the rim.
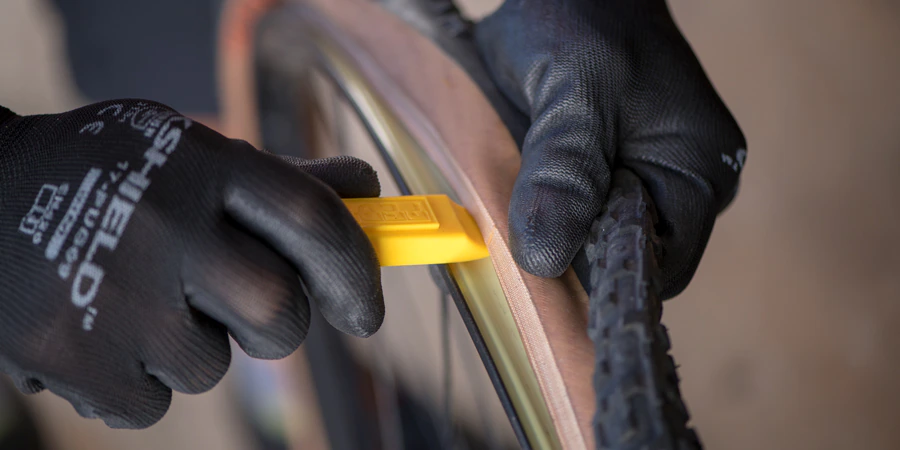
2. If you have tire levers, use it for additional leverage. When using tire levers, start on the section of your tire opposite the valve (to avoid damaging the valve stem). Use the longer end of one tire lever to pry the bead of the tire up and over the edge of the rim.
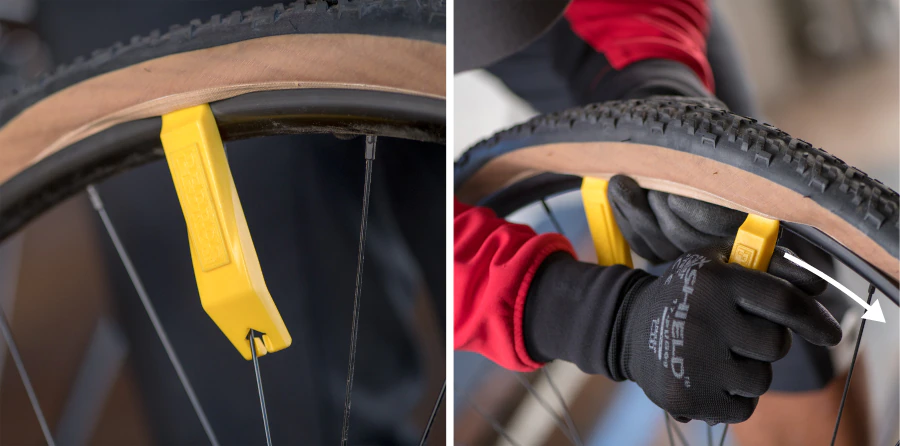
3. If you can’t unseat the tire with just one lever, place a second lever about two or three spokes to either side of the first. (Tires levers come with a handy notch that can be secured against a spoke, keeping the lever in place.)
4. Once a section of the tire bead is free, you should be able to free the rest of the tire bead with your fingers. Remove the inflatable tube from beneath the tire by pulling the valve stem out through the rim first. The rest of the tube should slide out easily when pulled. Be careful when pulling the valve out through the rim so you don’t damage the valve on the sharp edge of the rim.
Find the Cause of the Flat
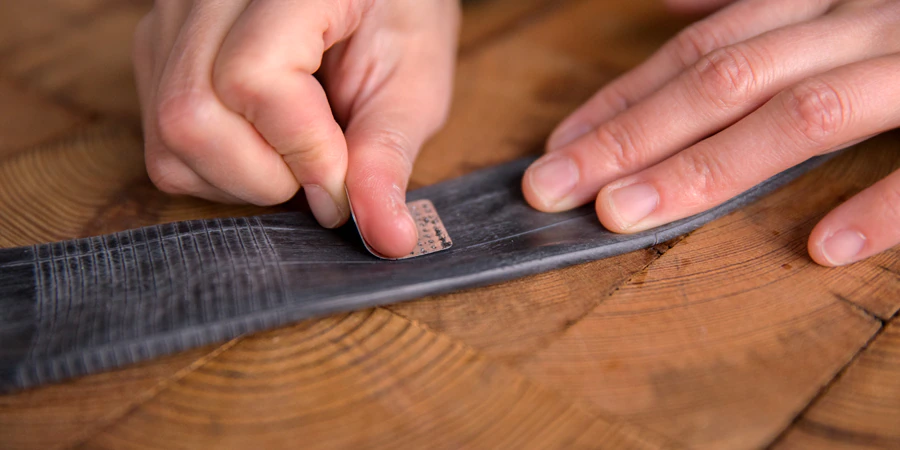
Carefully inspect the tire and tube for punctures, cuts or tears. Once you take the tube out, look at the following to find the cause of your flat so that you don’t immediately get another one with your replacement tube.
The tire: Start on the outside of the tire and work your way in. Look for any embedded objects in the outside tread. Thoroughly check the tire with your thumb and index finger, feeling the inside of it. If you find something, check the tube at the same approximate location to see if there’s damage there.
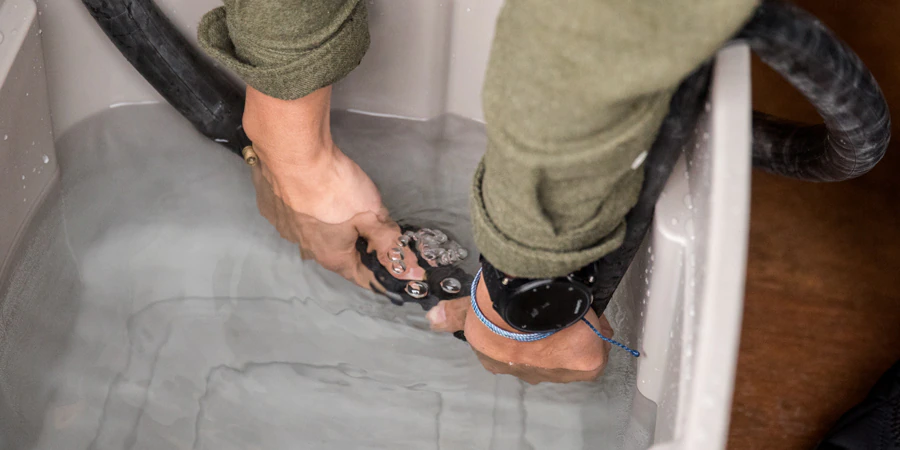
The tube: Tube damage can be difficult to spot. If you don’t see any obvious punctures or blowouts, inflate the tube to check for escaping air. To find very small leaks, bring the tube close to your face to feel for air or listen for a hiss, or submerge it in water and look for bubbles.

The valve: If the valve stem or base is cut, cracked or severely worn, it may be leaking. If so, the entire tube will need to be replaced.
The rim: Look for protruding spoke ends inside the rim, or areas where the tube may have pinched against a spoke-hole opening.
Tips:
- Don’t remove the tire all the way from the wheel. Once you identify damage somewhere, you can check the same location across the tire, rim and/or tube to see if you can identify the cause of the problem.
- Add a pair of tweezers to your bike repair kit to remove small items from your tire or tube.
Should You Replace or Repair A Damaged Tube?
When to Replace Your Tube
To save time while out biking, many cyclists may prefer to replace a damaged tube with a new one and repair the old one later. You should also replace—instead of patch—your tube any time the damage is too extensive or severe to patch, when a patch job fails to hold or when the tube’s valve is damaged.
How to Repair a Damaged Tube
Most commercial patching kits contain everything you need to create an effective patch in the field. Follow these general steps to repair your tube:
1. Find the damaged area.
2. Clean and dry the damaged area.
3. Rough up the surface of the damaged area with sandpaper (to help the glue adhere).
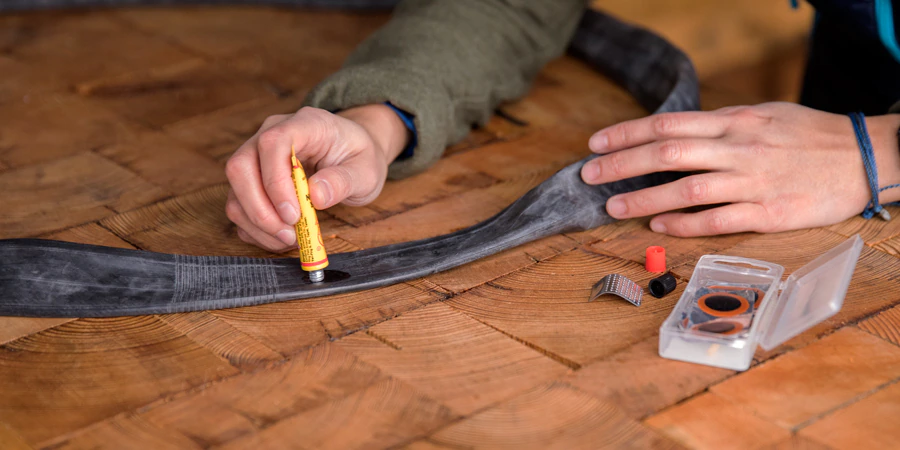
4. Spread the glue (vulcanizing fluid) and allow it to set until tacky.
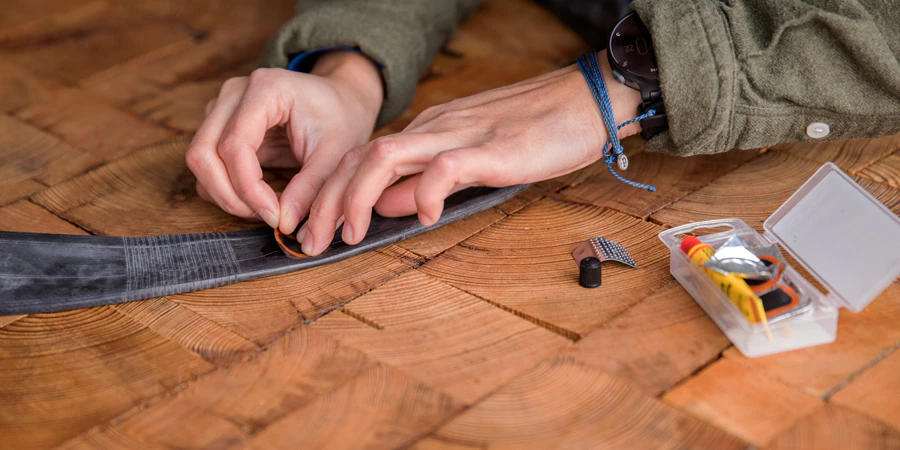
5. Apply the tube patch and hold it in place with pressure.
Repair hack: To temporarily fix a tear in the tire sidewall, use a folded-up dollar bill (or an empty energy gel wrapper). Place it in between the tire and the tube so it covers the gash and prevents the tube from bulging through. You can also use shoe glue.
To read more, read our article on How to Patch a Bike Tube.
How to Put a Bike Tube Into a Wheel
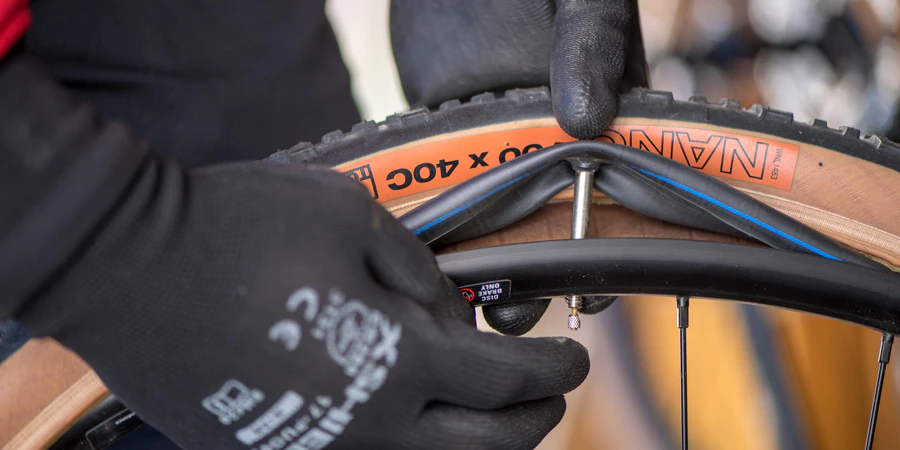
1. Partially inflate your new or repaired tube to give it shape and ensure it holds air.
2. If you completely removed your tire from the rim while fixing your flat, push one edge (or “bead”) of the tire inside the rim.
3. Then, insert the valve stem into the valve hole on the rim. Check that the valve stem is straight and not at an angle.
4. Then place the rest of the tube inside the tire.
5. Beginning at a point opposite the valve, push the other tire bead inside the rim.
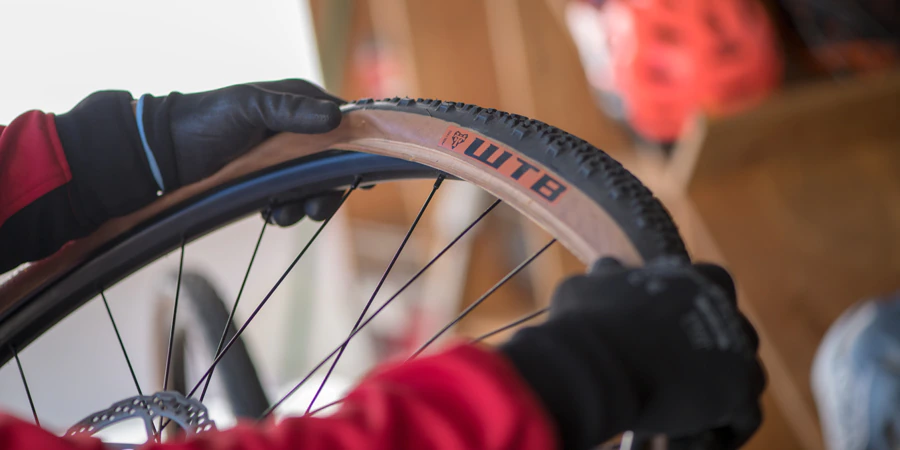
6. Proceed around the wheel (in both directions at the same time), working more of the tire bead inside the rim. This will get harder as you go. Pinch both sides of the tire in toward the center of the rim to make things easier, or carefully use a tire lever to complete the job. Use caution when using a tire lever to avoid pinching the tube.
7. Once the tire and valve are in place, check along its edges to make sure that the tube is not caught between the rim and the tire bead. This could cause another flat.
8. Now inflate your tire slowly, checking both sides of the rim to make sure that the tire bead stays firmly seated. Double-check the valve as you go to ensure it remains straight. To make sure your tube doesn’t get caught between your tire and the rim, go around the whole tire once and pinch both sides of the tire inward.
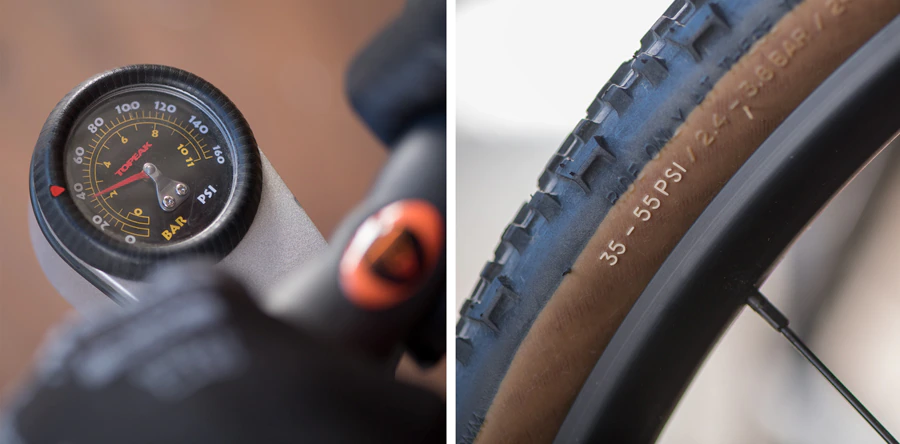
9. Inflate the tire to its recommended pressure (printed on the tire itself or in your owner’s manual). If you don’t have a gauge, use your thumb as a guide. If your thumb presses in easily, keep pumping.
Reinstall the Wheel
How to Put the Rear Wheel Back On
- With the bike flipped over, position the rear wheel so the top section of chain is draped over the smallest cog in your cassette.
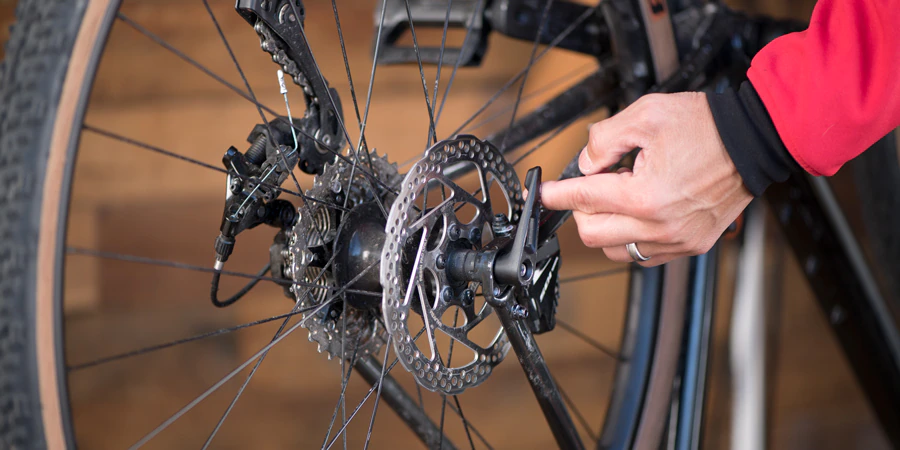
- Line up the axle of the wheel with the dropouts on the bike frame. Lower the axle into place while pulling the derailleur back to get it out of the way. Make sure the axle is firmly in the dropouts.
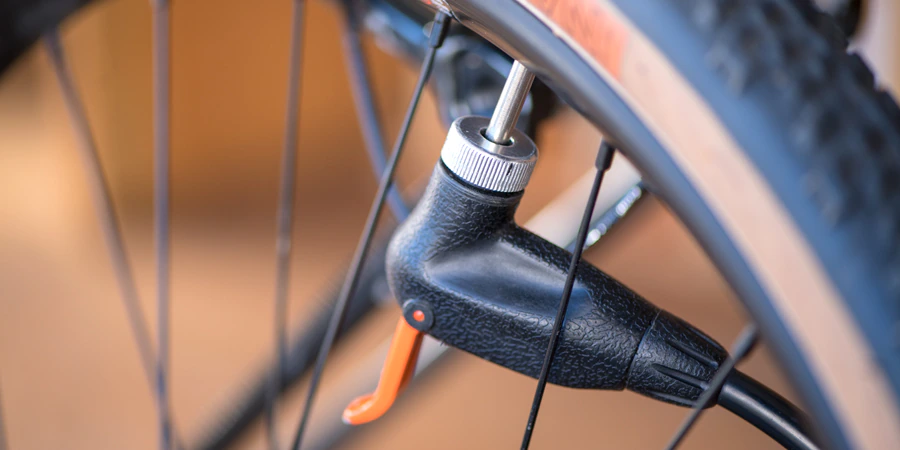
- Holding the quick-release lever in place, tighten the nut on the drive side of the bike. Close the lever. Make sure it’s tucked out of the way and not touching the bike’s frame. If the lever closes too easily and is touching the frame, it’s probably not tight enough.
- Remember to reconnect your brakes (if necessary) and make sure they’re working.
- Spin the pedals and make sure the gears shift normally.
How to Put the Front Wheel Back On
- Line up the axle of the front wheel with the dropouts in the fork and lower the wheel into place. Make sure the axle is seated in the dropouts.
- Hold the quick-release lever in place as you tighten the nut. When the nut is tight, close the lever. Make sure it’s tucked out of the way and not touching the bike’s frame. If the lever closes too easily and is touching the frame, open the lever and tighten the nut some more.
- Reconnect the brakes (if necessary) and make sure they’re working.
Other general tips:
- To get over any fears of fixing a flat bike tire, practice doing it several times at home until it becomes routine.
- If you get a flat tire in a place that’s unsafe, move yourself away from the unsafe area. Walk your bike to a public place or where you’re not in danger of getting hit in traffic.